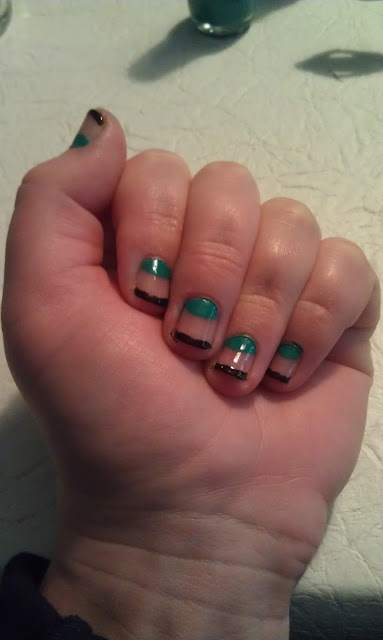
Let me tell you a little story...when I was a sophomore in high school, I had a few flirtations with fashion. One of these times, I decided to paint my nails a dark-ish blue (something between cobalt and navy). I thought it was cute and fun and
so much more interesting than the white French tips that where all the rage. So the next day at school one of my guy friends said something like, "Wow, blue nail polish...don't tell me you're going goth on me!" Okay, 1: how do you go from the color blue to goth? I mean, really? And 2: this totally shook my fragile teenage self-confidence and I'm pretty sure I didn't do any fun nails again for a few years.
The point of this (probably boring) story is that I absolutely love how fashion has evolved from, in the case of nail art, something that was really "in" being the only cool thing to do, to now doing whatever the hell you want and not being seen as weird.
So anyways, this little mani is kind of like a cross between a reverse-lunar mani (check it out
here) and an Anna-style French mani (aka black tips instead of white). Enjoy!
1. pick your polish / gather your materials
 |
COLORS Sinful Colors Rise and Shine, Petites Night TOPCOAT Essie No Chips Ahead
ALSO nail polish remover, q-tips, large glass of diet Coke (optional) |
>I realized this when I was about 3/4 of the way done that a
remover pen would work a lot better/faster than q-tips, so if I do any more manis like this I'll definitely be picking one up beforehand.
2. paint the lower portion one color
 |
| No need to be exact, we'll tidy it up soon. |
3. paint the upper portion a second color
 |
| I used two coats per color. |
4. pour a bit of remover into the cap, and shape the polish on nails into a semi-circle shape
 |
| This can take awhile, so be patient! Or use a remover pen. |
>If you accidentally take off a bit too much polish, use a toothpick dipped in the polish to get very precise color.
5. add topcoat, all done!


